EBIFour.com Training Clarify Tips Customizing Your Cleo Clarify Studio - Changing the Location of Studio Toolbars
Customizing Your Cleo Clarify Studio - Changing the Location of Studio Toolbars
31st May 2016

When a user first opens the Cleo Clarify Studio for the first time, they are presented with a lot of new toolbars, window panes, and tab locations that they’ve never seen before. It does take some time to learn the user interface; however, what many new users don’t know is that you can modify many Studio display options that may increase your experience and usability.
Don’t settle for the default Studio appearance; instead, change it to suit your needs! Perhaps you have difficulty reading the tiny text in the Auditor logs, often maximizing your monitor to an absurd resolution just to make the text readable. Or maybe you would prefer the Perspective toolbar being displayed directly above its Views. The next series of Tips will take you through many of the common display options that can make the Studio work better for you!
Changing the Location of the Perspective Toolbar
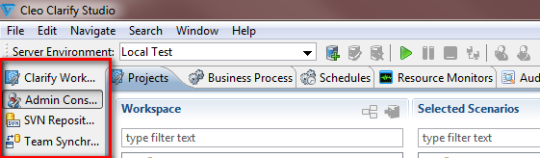
The Perspective toolbar is originally located in the
upper-right corner of the Cleo Clarify Studio.

The default location isn’t collected near the Views, Project Explorer, or any other essential buttons. Also, some of the values are truncated! For example, in its default location, all of the available Perspectives are reduced to fit in its location.
- The Clarify Workbench Perspective is simplified to Clarify Work…
- The Admin Console Perspective is simplified to Admin Cons…
- The SVN
Repository Exploring Perspective is simplified to SVN Reposit…
- And finally, the Team Synchronizing Perspective is simplified to Team Synchr…
If you’ve grown used to this, this may be second nature and not required to customize. But changing this location, and eliminating the truncation of the Perspective names, will help you learn and can maximize your productivity.
Follow these steps to make this change.
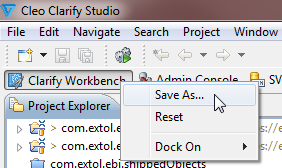
1. Right-click over your Perspective toolbar, preferably the Clarify Workbench Perspective and hover over Dock On and select one of the following options:
a. Top Right – This option is the default option, docking the Perspective toolbar in the upper-right of the Studio.
b. Top Left – This is the favorite
Perspective location of many new customers, as it docks the Perspective toolbar
to the upper-left of the Studio, above the Views toolbar. This Perspective location allows for the
complete names of the Perspectives to be viewed.

c. Left - This Perspective location docks the Perspectives to the left of the Studio and also truncates the names to fit in its location, as shown in the image below.
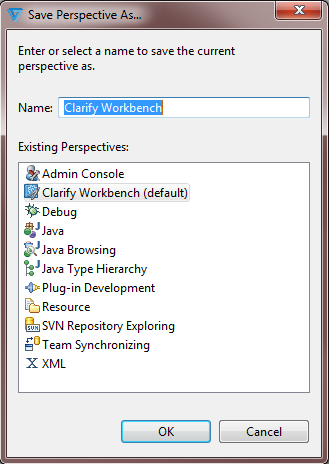
2. Once you’ve selected your desired location, verify that the Clarify Workbench Perspective is selected, right-click and select Save As…
3. The Save Perspective As window displays. The name Clarify Workbench is automatically populated in the Name field. Click OK.
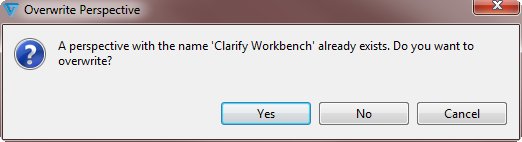
4. A popup displays indicating that the name already exists, and asks if we want to overwrite. As we would like to overwrite the default location of the Perspective toolbar, select Yes to save your change.
Note: Additional Perspectives can be created by adding a custom name, however, the Clarify Workbench Perspective will change to whatever name you have chosen. The functionality is still the same, but the visual change will be saved.
So, you may know how to do this if you’ve watched an EXTOL webinar, attended an EXTOL University session discussing changing the values, or even if you’re opened the Studio and clicked around until you’ve figured that out on your own.
Inside of the Windows | Preferences, there are additional options that can allow you to customize your Perspective toolbar even more!
To access that toolbar, follow these steps.
1. From the main menu, navigate to Windows | Preferences.

2. In the Preferences
window, navigate to General | Appearance
in the left pane.
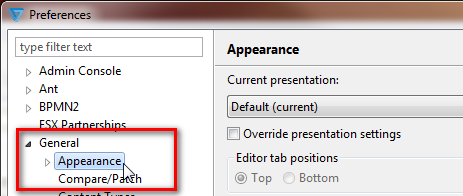
3. Additional options can be configured in the Appearance section in the right pane.
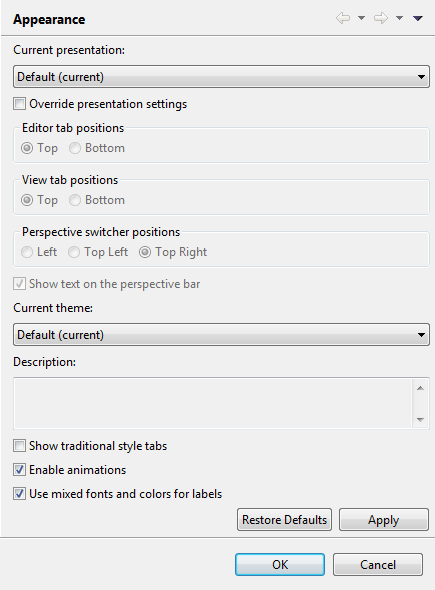
Before making any modifications to the Appearance options, it is recommended to verify that all changes to your resources have been previously saved. In this pane, there are following options are available.
- Classic Presentation
- Default (current) – This view is the main view, and default view that you’re using.
- Eclipse 2.1 Style Presentation
- Editor tab positions – This allows customization to the position of the Editor toolbar
- View tab positions – This allows customization to the position of the Views toolbar
- Perspective switcher positions – This allows
customization to the position of the Perspective toolbar
Note: In the exercise above, this was changed by selecting Dock On.

- Current theme – Not in use
- Description – A description of the selected theme, if available.
- Show traditional style tabs – This option will eliminate the rounded edges of tabs, and replace them with a square more classic style tab.
- Enable animations – Eliminates gif animations from the Studio.
- Use mixed fonts and colors for labels – Does not maintain a standard format for fonts and colors.
Please Read:
Please use your discretion in making any modifications to these
values. Once you’ve Applied the changes,
and selected OK, a popup may ask you
to restart the Cleo Clarify Studio. If a
change is saved that is undesired, you can always navigate back to the
Appearance section, and select Restore
Defaults.
By: Sean Hoppe on